Hello, in this tutorial we will learn to use the component tray / window. This tutorial will also allow us to better understand how to use the 3DWarehouse via the “components” window.
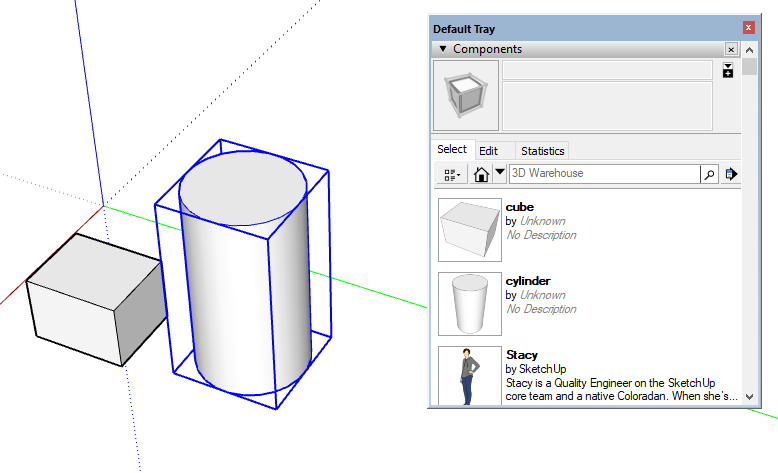
To understand the use of our “components” tray we will create two components. The first I will call it cube and the other as cylinder (you will have guessed that I made a cube and a cylinder).
I will now ask you to go to the “windows” menu and choose “components” or Window > Default Tray > Components.
You will have the component window that will be displayed. We will click on the small house in the window next to search box. This little house indicates that we are going to see all the components that are in our current file.
The important information to remember that, when we delete a component in our 3D view, the component is not deleted from the file and will be in this window. This window does not contain groups, only components.
We can notice that Stacy (the woman in 2D) is also a component.
Thanks to this window, we will be able to make recall our components very easily. We just have to click on the desired component. SketchUp will automatically set the “move” tool with the end of our component selection, now we can place it with a single click where we want to place it. The base point of Component will be taken to during the placement of component (origin of the component when it is created). We can modify it but it is not the purpose of this tutorial.
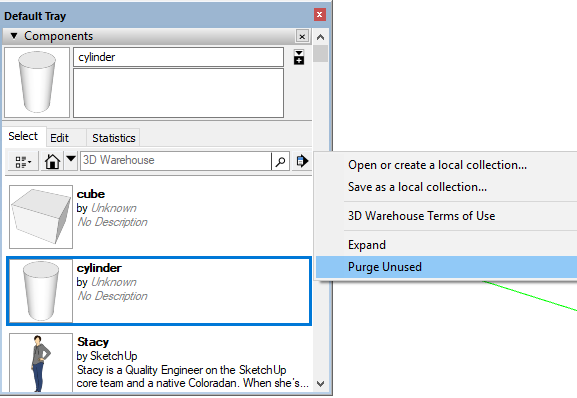
As I said, in this window we will find all the components that we created in our model, even if we deleted them. If you want to remove the components from your window (which will permanently delete them this time) you can right click on the component (in the tray) and click on “delete”. If you have a prompt that says “Attention all copies will be deleted” it means that there is still a copy of this component in your model. Alternatively, you have another approach to remove all the components of your file that are not in your 3D view. For this you can press the “details” arrow in the window and choose the “purge unused items” option.
If you want to modify the properties of the component as and when it was created, it will also be in this window. For that, make a right click on the component (in the window) and click on “Properties”, you will have the “Edit” tab which will be selected which will allow you to choose your options as during the creation of your component.
Here we have understood the basics of this window “components” that allows us to do a lot of things already. We will learn in our next tutorial how to use the 3DWarehouse. Please provide your comments below.