Hello, we will learn in this tutorial about “follow me” tool.
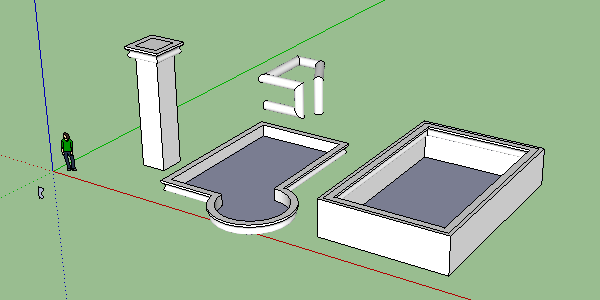
![]() The follow me tool will allow us to follow a profile along a path. Thanks to that, we will be able to easily make cornices, piping and other things. Here are several examples of what we will be able to do with this tool.
The follow me tool will allow us to follow a profile along a path. Thanks to that, we will be able to easily make cornices, piping and other things. Here are several examples of what we will be able to do with this tool.
To understand its use we will make a simple example with a pillar. Once we have made our pillar with our rectangle tool and our push / pull tool we will make our profile. The profile is like a section cut of our cornice, it is this profile that we will follow along our path to make our cornice.
 For this, we will make our profile on a rectangle in top view.
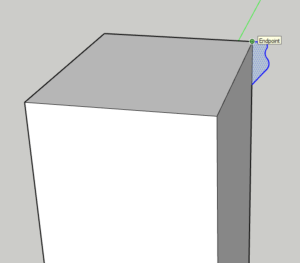
Once we have drawn our profile, we will arrange it on one of the corners of our pillar perpendicularly.
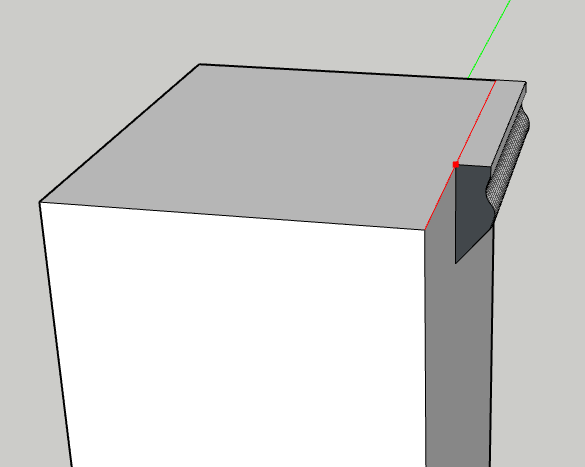
Now that we have our profile in place, we will have to indicate path to follow. In our case we will use the four segments from the top of our pillar. To indicate the path we we can pre-select the path first, or else we need to indicate the direction during the follow-me. When we click on Follow-me tool selection of path is removed, SketchUp has kept this information in its memory and now we must choose the profile that will have to follow this path. With our “follow me” tool we will click on the face of our profile. At this point SketchUp will make our cornice.
If you have followed well you should end up with this kind of image:

We can also use our “follow me” tool directly without defining our path. We will have to manually follow the path to do it, this is a source of errors and complicated, so it is best to do according to the approach I showed you earlier. Manual path provide you below output:
Obviously this tool is not limited to making cornices. As you can observe in the first image we can do everything, importantly we should have a profile and a path.
Please provide your comments below.