Hello, in this tutorial we will learn two basic drawing tools: the “line” tool and the “rectangle” tool. We will also see how to enter the dimensions to draw lines and rectangles of the exact dimension we want.
To do all our tests, we will configure SketchUp to work in top view without perspective. To go in top view, just click on the icon of the “roof of the house”. Note that other views such as Front, Back etc are accessible by other icons. For the moment it is the view from “Top” that interests us. For this, just click on the roof of house (marked in Red color) in the buttons of the bar “Views tool”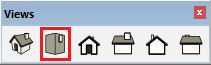 (if you do not have this toolbar, to view it just go into the “view” menu in “toolbar” and check “Views”): top view
We will use camera view of “parallel projection”, it will allow us to work in “2D” more easily. To understand the difference between this view and the perspective, here is the effect on a parallel projection:
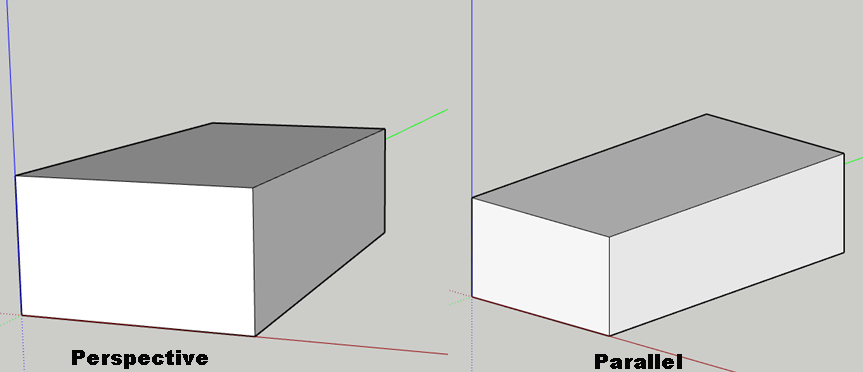
The perspective mode is therefore the one that simulates the reality, while the parallel projection makes it possible to preserve the parallels. The Parallel view is very practical when one works with architecture, interior or mechanical workflows. It allows to work with accurate scale. To work in “true” 2D, we must therefore choose the parallel projection.
Setting it in SketchUp is simple, go to pull down menu “camera” and then click on “Parallel projection”. Once we want to do 3D we will return to perspective. Perspective mode is more natural when you make volume, and therefore easier for understanding. If you have followed the steps so far, you should have a view like this: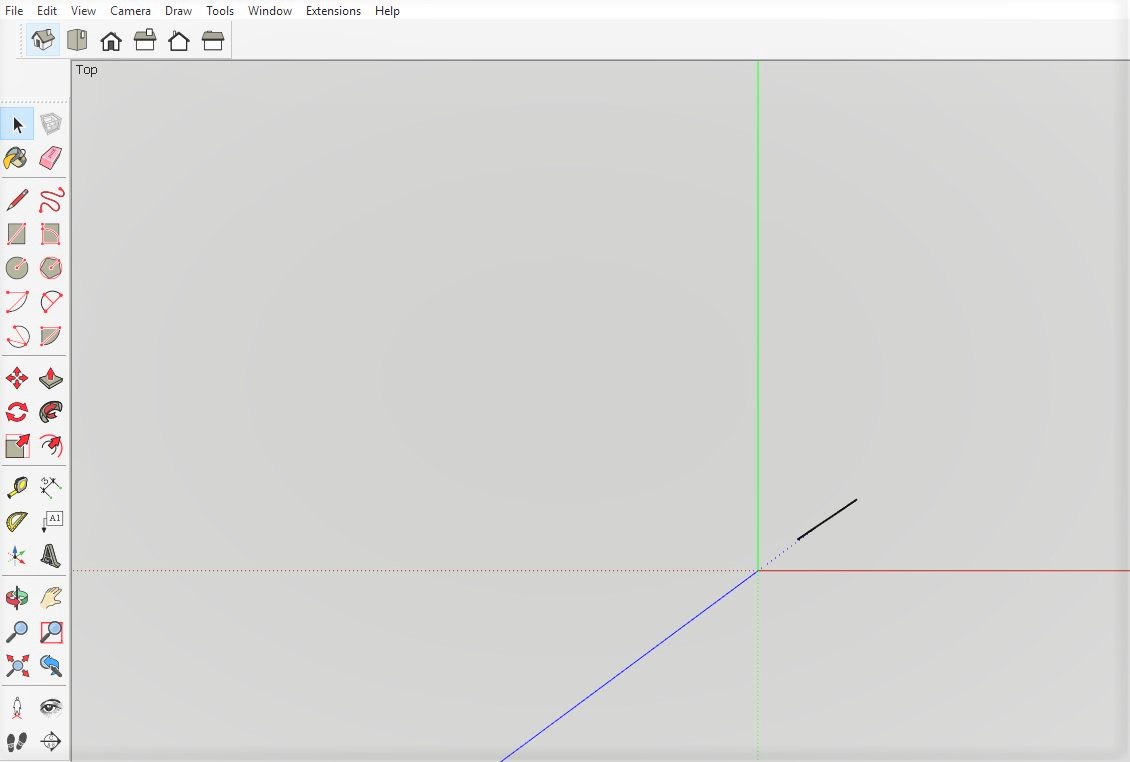
You will notice the black line. This is 2D person, various individuals in respective SketchUp version. As this person is 2D, and we see it all flat from above. If you move in panoramic you will always see a line. On the other hand, if you have not activated the “parallel projection” mode in this case you will end up seeing “2D Person” differently than in the form of a line. You can also try to change the view mode to see the difference when you move in panoramic. Now that we saw the difference between “parallel projection” and “perspective”, we can begin to discover the drawing tools of SketchUp: drawing tools so we have the “rectangle” tool, the “line” tool, the “circle” tool, the “arc” tool, the “polygon” tool and the “freehand” tool.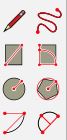
As I said at the beginning of the tutorial, we will see the “line” tool and the “rectangle” tool. line tool We will start with the line tool. ![]() We click on the button or we use the keyboard shortcut “L” for “Line”. This tool can be used in two different ways depending on how you click with this tool. The first way is to click & drag on the button and draw our line. In this way we have created a simple line. In SketchUp we will use very little click & drag of drawing a line, we will prefer the second method. Second method is done with a simple click, we release the button and we will draw our line. To finalise our line, we click again. And you will see that by doing this we started a second line that starts where the first stops. As long as we have not closed our polygon, we will start a new line using this method. If you do not want to start another line for one reason or another, you can press the “escape” key on your keyboard at any time to stop making a new line. When trying this tool you probably had observed that at times the tool has a tendency to “lock” on a particular axis by taking the color of red, green or Blue, in some cases. This is called inference, it’s about guessing the user intent and guiding in that direction. This is really one of the strengths of SketchUp software. We will see in more detail in the upcoming tutorials, how inferences work in SketchUp. Now, maybe you are wondering “how can I have a line of exactly 2m? “
We click on the button or we use the keyboard shortcut “L” for “Line”. This tool can be used in two different ways depending on how you click with this tool. The first way is to click & drag on the button and draw our line. In this way we have created a simple line. In SketchUp we will use very little click & drag of drawing a line, we will prefer the second method. Second method is done with a simple click, we release the button and we will draw our line. To finalise our line, we click again. And you will see that by doing this we started a second line that starts where the first stops. As long as we have not closed our polygon, we will start a new line using this method. If you do not want to start another line for one reason or another, you can press the “escape” key on your keyboard at any time to stop making a new line. When trying this tool you probably had observed that at times the tool has a tendency to “lock” on a particular axis by taking the color of red, green or Blue, in some cases. This is called inference, it’s about guessing the user intent and guiding in that direction. This is really one of the strengths of SketchUp software. We will see in more detail in the upcoming tutorials, how inferences work in SketchUp. Now, maybe you are wondering “how can I have a line of exactly 2m? “
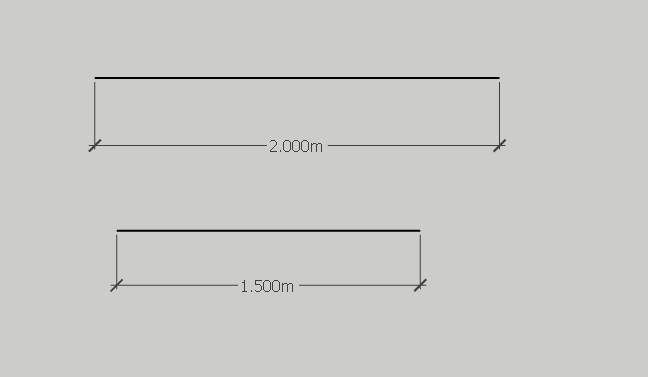
At the bottom right of SketchUp we have a window that indicates or shows us the length. This window is a input window. We will see how to enter a value to indicate an exact length. This is simply achieved in SketchUp, here again, we have two ways to proceed: input the length before or after making your line. When I say before I of course want to say before you second click to finish your line, not before you start it of course. When you start your line, give the direction of it, and then you can simply type on your keyboard the length of the line. In the case of 2m, we simply type “2m” and then to validate this value we press the “enter” key. To put “1.5m” you must absolutely put a point and not a comma. This can be confusing at first. If you have an error message when entering your decimal values, it will probably be because of this. You can change this size at any time by retyping the desired value, all this as long as you have not started another action or command (make another line, or change tool for example). Of course, giving dimensions is not limited to meters only, you can type “40cm” or even millimeters “20mm”. The precision you can have in SketchUp depends on your preferences. To configure these preferences we go in the “window” menu and then in “model info”. You should have this window displayed: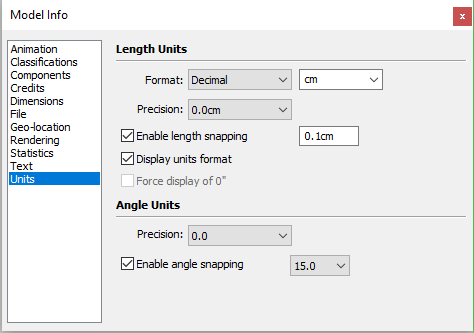
This window affects only your open file, which means that it will not affect any other file. In this window we can see that by default the unit used is the “cm”. This means that if we do not indicate a unit of measurement to SketchUp it will put the measurement in centimetres. This is useful if you work a lot with centimetres. If, on the other hand, you use mainly meters it would be wise to change the default unit and put it on “meters” in the drop-down menu. So when you type “20” it will directly “20cm”. Precision indicates the number of decimal places that you can use after zero.
![]() Now we will see the “rectangle” tool. Click on the button or press the keyboard shortcut “R”. The rectangle tool is easy to use. Once again you have the choice to make your rectangle in two ways. The first is to click, keep the mouse button pressed, and draw your rectangle. Once the rectangle is done you can release your button. The second method, which I suggest you to use, and make a simple click, move your mouse in the direction where you want to make your rectangle. Unlike the “line” tool it does not start another rectangle doing this way. You can specify a size in the, same way as your line, having two measures you will have to separate them by a “,” (comma). For example if I want a rectangle of 10m x 20m I type “10m, 20m” or “10,20” if I have the unit meter by default. To know the orientation of the rectangle, the easiest way is to observe at the measurements while drawing our rectangle.
Now we will see the “rectangle” tool. Click on the button or press the keyboard shortcut “R”. The rectangle tool is easy to use. Once again you have the choice to make your rectangle in two ways. The first is to click, keep the mouse button pressed, and draw your rectangle. Once the rectangle is done you can release your button. The second method, which I suggest you to use, and make a simple click, move your mouse in the direction where you want to make your rectangle. Unlike the “line” tool it does not start another rectangle doing this way. You can specify a size in the, same way as your line, having two measures you will have to separate them by a “,” (comma). For example if I want a rectangle of 10m x 20m I type “10m, 20m” or “10,20” if I have the unit meter by default. To know the orientation of the rectangle, the easiest way is to observe at the measurements while drawing our rectangle.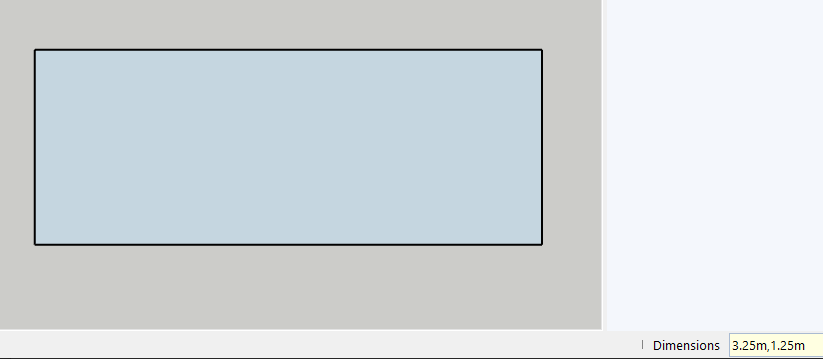
In this example we can see what each measure represents. With this, we have completed the Line tool, Rectangle tool and the input of dimensions.
In the next tutorial we will understand the circle and polygon drawing tools. Thank you for giving your comments below.