Hello, we will learn in this tutorial the “scale” tool. Most popularly used for Scaling purpose.
![]() This tool will allow us to resize geometries as well as objects like groups and components. The keyboard shortcut for this tool is “S” as “Scale”. As for all SketchUp tools, we can either select earlier what we want to modify, or do it after choosing our tool. In the case of the “Scale” tool it is better to select first. When you have selected elements that you plan to resize and clicked on your button (or the “S” key on your keyboard), a yellow bounding box appears around the object with small green grids.
This tool will allow us to resize geometries as well as objects like groups and components. The keyboard shortcut for this tool is “S” as “Scale”. As for all SketchUp tools, we can either select earlier what we want to modify, or do it after choosing our tool. In the case of the “Scale” tool it is better to select first. When you have selected elements that you plan to resize and clicked on your button (or the “S” key on your keyboard), a yellow bounding box appears around the object with small green grids.
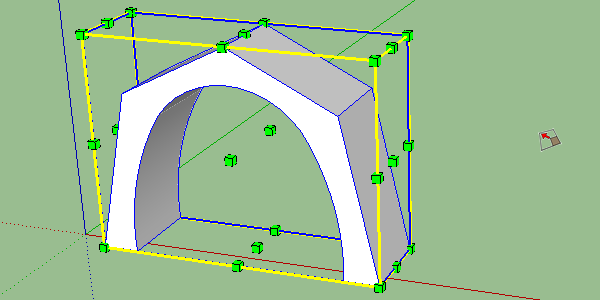 To do our resizing, we will use these small green grids (we will use them as our handles). Each handle will resize in a different way depending on where it is placed
- Using the handles found in the corners we will perform a homogeneous scaling, that will resize without losing the ratio between height and width.
- When we use the handles in the centre of the faces we will resize along a single axis and
- when we take handles at the centre of the segments we will move on two axes.
We can add constraints on each handle. For example, if I want to influence only one but I still want to keep the ratio height / width, hold on the “shift” key of our keyboard while doing our resizing. In the same way by pressing the “ctrl” key, we can resize from the centre of the object rather than from the handle we select. Of course we can combine these two keys to make a homogeneous starting from the centre.
Note that we can of course give a value from the keyboard for resizing. This is treated as a scaling factor, which means that if I want to enlarge twice the height I take the middle handle up, I give my direction, I type “2” and I press “enter “.
Please provide your comment below.