Hello, in this tutorial we will learn one of the most basic things in SketchUp: the groups. We will understand the components that are similar on certain points in a next tutorial.
When I say it’s fundamental I’m not exaggerating, you’re going to use groups all the time. In fact, groups allow you to isolate the entities from each other, in other words you will remove the adhesion effect of the geometries we have seen here: SketchUp Tutorial | adhesion of the geometries in 2 dimensions.With a small example, let’s see why using groups will become important to us.

Imagine that I want to put a sofa (which I will represented as cuboid) attached to a wall. If I do not do group the couch will “merge” & “split” with the wall and when I move sofa again the wall will stretch with it.
Now we will start the operation again by making the sofa a group. For this we must select what we want to convert a group (triple click with the selection tool) and we right click on this selection. In the contextual menu, we will choose “create a group”. Here you have to created your first group. You will observe that, when we select it, its edges become blue to indicate that we have selected our group. We can now retest our operation: move our sofa against the wall and then move it out several times.
This time to move our “sofa” from the wall we did not need to force the inference on any axis because SketchUp understood that the sofa was a different entity from the rest of our apartment.
Now that we have made a group, we can not change it as we normally would. If you try to make a hole in a group with your “rectangle” tool and your “push / pull” tool you will find that it does not work. Indeed as it is a different entity as a group it does not communicate any more with the group. To modify our group we will
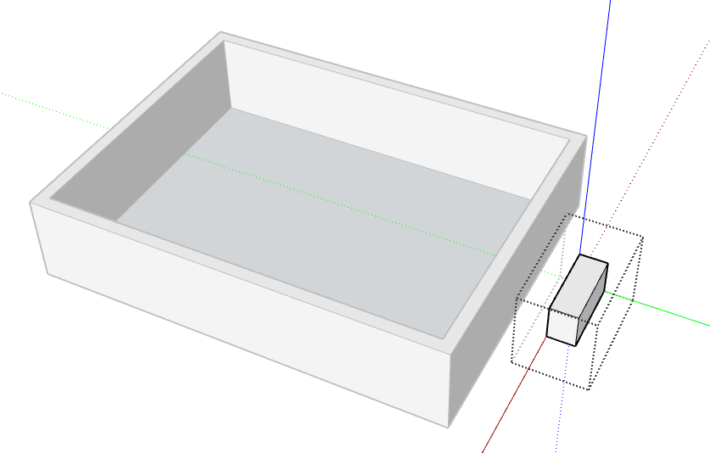
double click on it, or we will right click and select “edit group”. Once you have done this you will see that the other objects take a greyish colour to indicate that they are no longer accessible.
On the other hand, your group gets a kind of dotted “container” around it. This shows that what is included in your group.
Once you are in the group you can make your changes without affecting the objects “grayed out”. To exit the group, you can press the “escape” key on your keyboard or click outside the group with your selection tool. All the difficulty you may have with the groups is to be make your changes or edit a grouped element.
Of course you can make several groups in your SketchUp file and as a best practice, I urge you to do so to avoid unintentionally changing the other objects in your model.
In the next tutorial we will learn the use of components, you will see that it looks like groups but with some interesting features. Please give your comments below.